
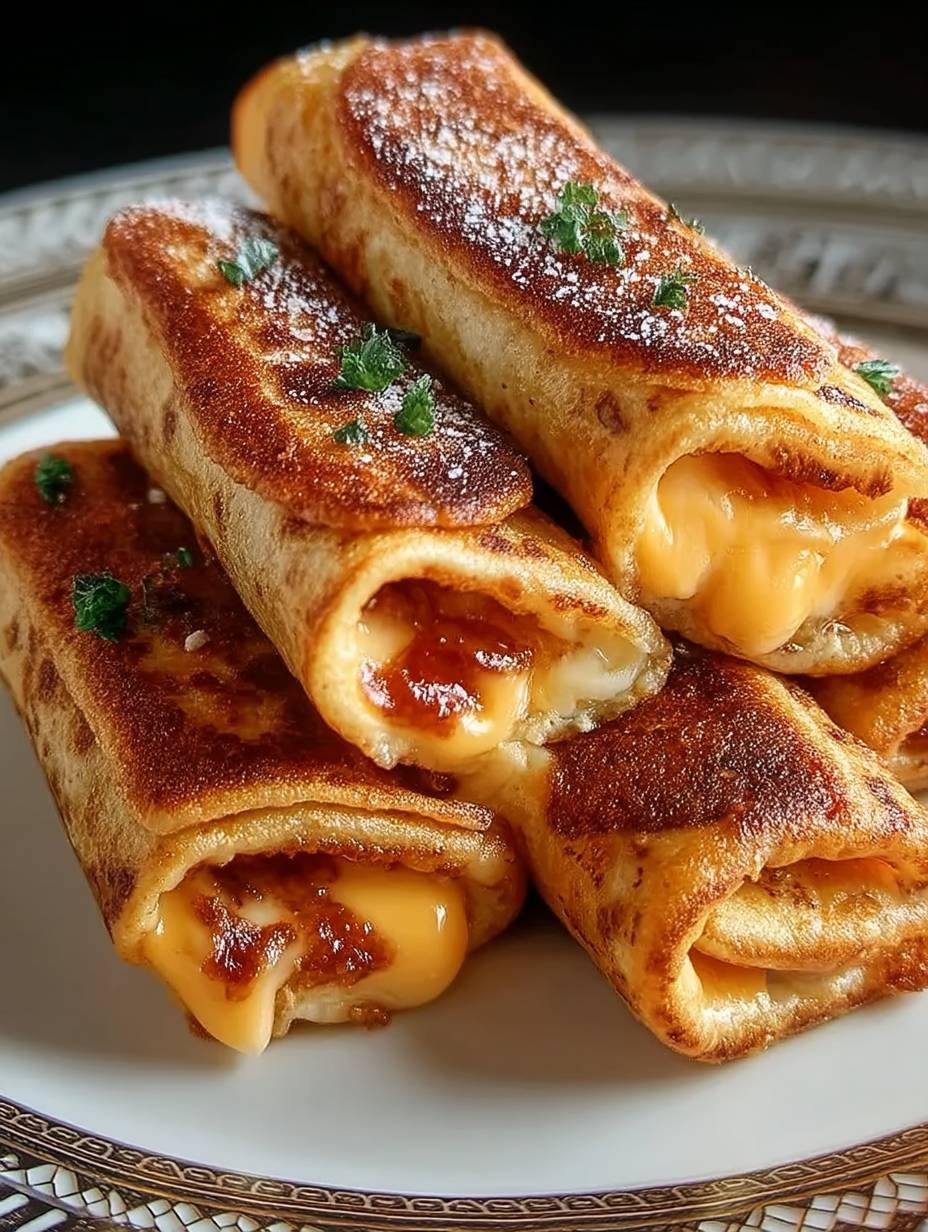
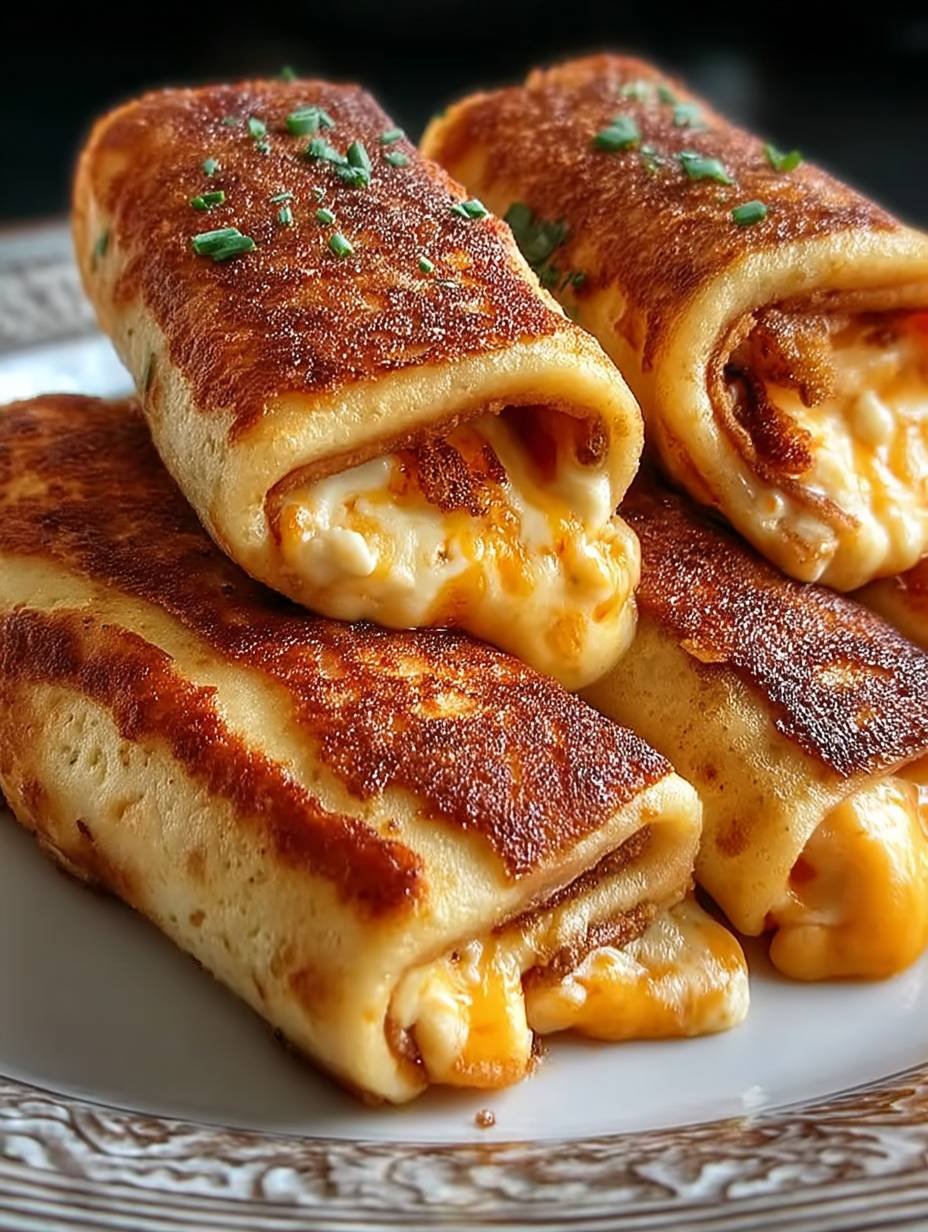
Golden, crunchy exteriors give way to an oozy interior filled with gooey, melted cheese, creating a symphony of flavors and textures that dance delightfully on your palate. These Grilled Cheese Roll Ups are not just snacks; they are whimsically delicious bites that can turn any ordinary day into a joyous celebration.
I fondly remember the first time I attempted to make these cheesy wonders. My kitchen turned into a cheese factory, and I nearly set off the smoke alarm. There I stood, proud and slightly bewildered, and thought, “Who needs a fancy restaurant when you have gooey cheese and crispy bread at home?” Little did I know that these Grilled Cheese Roll Ups would become a go-to recipe for parties, late-night snacks, and, of course, lonely Tuesday evenings when the couch feels especially cozy!
Why You’ll Love This Recipe
This Grilled Cheese Roll Ups Recipe is easy to whip up even for novice cooks, making it perfect for those craving comfort food without the fuss. With a unique flavor profile that combines the warmth of melted cheese and the crunch of golden bread, it is sure to impress family and friends. These roll-ups are visually appealing, boasting a beautiful golden hue that catches the eye and whets the appetite. Plus, their versatility means you can customize the filling with your favorite cheeses, herbs, or even add some veggies for a fun twist!
Ingredients for Grilled Cheese Roll Ups Recipe
How to Make Grilled Cheese Roll Ups Recipe
Follow these simple steps to prepare this delicious dish:
Step 1: Prepare the Bread
Using a rolling pin, gently flatten each slice of soft bread until it’s nice and thin, about a quarter of an inch. This allows for easy rolling and ensures your cheese is enveloped perfectly.
Step 2: Add the Cheese
Sprinkle a generous amount of the shredded cheese mixture evenly over each slice of flattened bread, leaving about a half-inch border. This guarantees the cheesy goodness remains inside while grilling, minimizing spillage.
Step 3: Season Up
Sprinkle a touch of garlic powder evenly over the cheese for that extra flavor kick. For added pizzazz, sprinkle chopped fresh herbs if you’re feeling fancy.
Step 4: Roll It Up
Starting at one end, carefully roll up each slice tightly, securing the cheese inside like a little cheesy burrito. If it looks like it’s a bit of a struggle, just channel your inner burrito artist and take your time—the cheesebombs will be worth it!
Step 5: Butter and Grill
Spread softened butter on the outside of each roll-up. Heat a skillet over medium heat and place the roll-ups seam side down in the skillet. Grill them for about 3-4 minutes on each side until golden brown and crispy, making sure to turn gently with tongs so that they don’t burst.
Step 6: Slice and Serve
Once beautifully golden brown, remove the roll-ups from the skillet and slice them diagonally for presentation. Garnish with fresh herbs, if you like, and serve immediately while they are melty and glorious!
These Grilled Cheese Roll Ups are perfect for snacking, entertaining, or simply enjoying during a lazy night in. The crispy, buttery outside gives way to a cascade of melted cheese inside, creating a fun food experience that will make your taste buds sing! Serve them up with a side of tomato soup or your favorite dipping sauce for a classic combo. Enjoy the cheesy goodness!
Improving the Cooking Method
For the Grilled Cheese Roll Ups Recipe, start by preheating the pan to medium heat. This ensures that the cheese melts evenly while the bread gets golden brown, leading to that perfect crunchy exterior and gooey interior.
Decorate Your Dish with Your Personal Touch
For the Grilled Cheese Roll Ups Recipe, consider swapping out the cheese for pepper jack or adding a dash of garlic powder for a flavorful twist. You could also play with different breads, using sourdough or whole grain for added texture!
Smart Tips for Storage and Reheating
To preserve the crunch of your Grilled Cheese Roll Ups Recipe, store the roll-ups in an airtight container, separated from any dips. Reheat them in a skillet for that fresh-off-the-stove taste and texture.
Practical Chef Advice
I remember the first time I made these for my niece. Watching her eyes light up as she took her first bite made it an unforgettable moment filled with cheesy joy!
Conclusion for Grilled Cheese Roll Ups Recipe
Indulging in this Grilled Cheese Roll Ups Recipe brings a delightful combination of gooey cheese and crispy, buttery bread. Perfect for a quick snack or a fun twist on a classic favorite, these roll-ups promise satisfaction in every bite. Whether you’re serving them at a party or enjoying them on a cozy afternoon at home, the rich flavors and simple preparation make them irresistible! Don’t wait to experience this cheesy goodness; gather your ingredients and try this recipe today for a delicious treat that you and your loved ones will adore.
Print
Grilled Cheese Roll Ups Recipe
- Total Time: 30 minutes
- Yield: 4 servings
Description
Golden, crunchy exteriors give way to an oozy, melted cheese interior in these Grilled Cheese Roll Ups. This easy recipe transforms a classic comfort food into whimsical, bite-sized delights perfect for any occasion. Ideal for parties, late-night snacks, or cozy evenings, these roll-ups invite customization with your favorite cheeses and herbs. Their visually appealing golden hue and delightful texture make them a hit with family and friends, ensuring every bite is a celebration of flavor. Perfect for any mealtime craving!
Ingredients
- Soft Bread, weiß oder Vollkorn
- Shredded Cheese, Mischung aus Cheddar und Mozzarella
- Butter, weich
- Garlic Powder
- Fresh Herbs, optional, gehackt (z. B. Petersilie oder Basilikum)
Instructions
- Mit einem Nudelholz jede Scheibe Brot vorsichtig flachdrücken, bis sie etwa einen Viertel Zoll dick ist.
- Eine großzügige Menge der Käsemischung gleichmäßig über jede flachgedrückte Brotscheibe streuen, dabei einen halben Zoll Rand lassen.
- Eine Prise Knoblauchpulver gleichmäßig über den Käse streuen.
- Mit frischen, gehackten Kräutern bestreuen, wenn gewünscht.
- Jede Brotscheibe von einem Ende her vorsichtig eng aufrollen, um den Käse sicher einzuschließen.
- Die Außenseite jedes Roll-Ups mit weichgemachter Butter bestreichen.
- Eine Pfanne bei mittlerer Hitze erhitzen und die Roll-Ups mit der Nahtseite nach unten in die Pfanne legen.
- Die Roll-Ups 3-4 Minuten auf jeder Seite grillen, bis sie goldbraun und knusprig sind, dabei vorsichtig mit einer Zange wenden.
- Die Roll-Ups aus der Pfanne nehmen und diagonal schneiden.
- Nach Belieben mit frischen Kräutern garnieren und sofort servieren.
Notes
Storage: Store any leftover grilled cheese roll-ups in an airtight container in the refrigerator for up to 3 days. Ensure they have cooled completely before sealing to prevent moisture buildup.
Reheating: To reheat, place the roll-ups in a preheated oven at 350°F (175°C) for about 10 minutes, until warmed through and crispy. Alternatively, you can reheat them in a skillet over medium heat for a few minutes on each side.
Serving: Serve the grilled cheese roll-ups warm, garnished with additional fresh herbs if desired. They pair well with marinara sauce or a side salad for a complete meal.
Chef’s Tip: For an extra flavor boost, mix your cheese with a pinch of smoked paprika or a dash of hot sauce before rolling. This adds depth and a hint of heat to your roll-ups!
- Prep Time: 15 minutes
- Cook Time: 15 minutes
- Category: Appetizers
- Method: Grill
Nutrition
- Calories: 300 kcal
- Sugar: 0
- Sodium: 600mg
- Fat: 15g
- Carbohydrates: 30g
- Fiber: 0
- Protein: 10g
- Cholesterol: 0
FAQs
How can I make my Grilled Cheese Roll Ups crispy?
To achieve the perfect crispiness with your Grilled Cheese Roll Ups, ensure the bread is well-buttered on the outside before grilling. Use a medium heat setting to allow the cheese to melt thoroughly while the bread toasts evenly. Avoid crowded pans for optimal browning, and flip the roll-ups gently. This attention to detail will result in a crunchy exterior and a soft, melty interior.
Can I customize the cheese in the Grilled Cheese Roll Ups Recipe?
Absolutely! You can customize the cheese according to your preference. While cheddar is a classic choice, feel free to experiment with mozzarella, gouda, or any other cheese that melts well. Combining different types of cheese can enhance the flavor profile of your Grilled Cheese Roll Ups, making them even more delicious and unique.
What can I serve with my Grilled Cheese Roll Ups?
Grilled Cheese Roll Ups pair wonderfully with a variety of dips and sides. Consider serving them with marinara sauce, a tangy vegetable dip, or even a simple side salad for a fresh contrast. Additionally, a bowl of warm tomato soup complements the cheesy roll-ups beautifully, creating a comforting meal that everyone will enjoy.
How can I store leftover Grilled Cheese Roll Ups?
To store leftover Grilled Cheese Roll Ups, allow them to cool completely. Then, place them in an airtight container or wrap them tightly in foil. They will keep in the refrigerator for up to three days. To reheat, you can use a skillet over medium heat or an oven set to 350°F until they are warm and crispy again. Enjoy them fresh for the best taste!


Leave a Comment